Hey guys! Do you know how to use Cricut Iron on to create amazing DIY projects? Last May month, I made a unique Pride Month banner. As you all know, every year in June, the surrounding atmosphere is full of love, embracing equality for LGBT people all over the world.
So, I decided to create this project based on a request from my best friend, Kevin. Being a part of this gay community, he eagerly requested that I make wall art that he could use to decorate his home during Pride Month. Then, what? I started asking about his choice, like what he exactly wanted and whether he wanted anything special for his home decor.
He told me about his ideas, like adding the phrase “Love is Love” with a colorful rainbow in the background. Initially, it seemed challenging, but I liked his ideas. Later, when I finished this, it became one of my favorite HTV projects of all time. Want to learn how I made it? Dive into this blog to learn how to use Cricut iron on vinyl!
What Cricut Supplies Do You Need to Use for Your Project?
Whenever I work on a project with Cricut, I gather supplies first. This is the most important and first thing that I prefer to do. So, let me tell you the supplies I used to make this “LGBT Pride Month banner.”
You might need the following supplies:
● Cricut machine
● Design Space app
● A long blank fabric (choose the length as per your requirements)
● Cricut EasyPress Mini
● Weeding Tool
● Cutting mat
● Colorful iron on vinyl (HTV)
How to Use Cricut Iron On to Create a Wall Art for Home Decor?
Now, let’s see the use of iron on by making a simple project. I will walk you through the simple steps, so follow the steps carefully given below:
Step 1: Creating a Wall Art Design in the Cricut Software
The first thing I did was create this design in Design Space. To create a design, you need to follow the instructions given below:
- First, you need to open your Design Space.
- On this app, go to the Search bar at the top and search for LGBT Pride Banner or anything that you want to make.
- Get those designs to your Canvas and edit and resize them as per your requirements.
Here’s what my design looks like. It took me half an hour to create such an amazing design.
For text, you can always rely on Design Space, as it offers the font styles for free.
So, once you are satisfied with your design and ready to cut it on the Cricut, press the Make It button.
Step 2: Preparing Your Materials Before Cutting
After hitting the Make It button, you must also turn on the Mirror button. Mirroring the design is essential for your HTV project.
Step 3: Cutting the Iron On Vinyl
From this point forward, I will teach you how to use Cricut iron on. Here, we will place the vinyl on the mat and cut it on the Cricut.
Follow the on-screen instructions to cut your iron on vinyl for Cricut projects. While following the instructions, you might be asked to load your mat onto the Cricut machine and cut it by pressing the Go button.
Step 4: Weed Out Your Design
After cutting, you just need to weed your design. A weeding tool can help you peel off the fine cuts easily without damaging the whole design.
Afterward, you have to place the cut pieces of vinyl on your blank fabric.
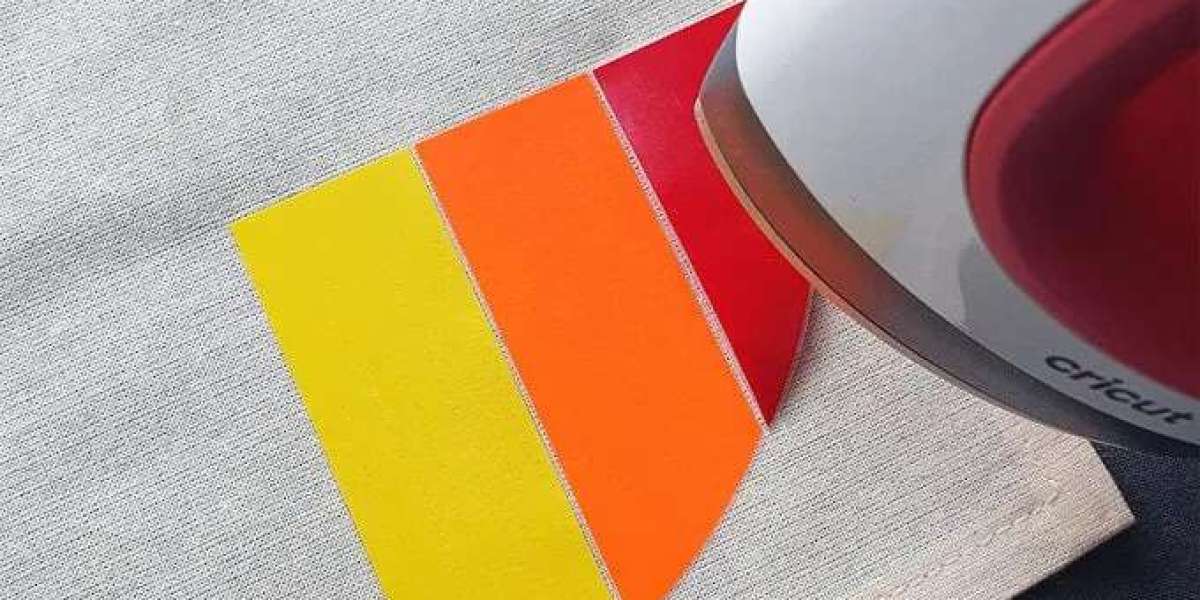
Step 5: Transfer the Wall Art Design
To transfer the design to a desirable blank, you will need a Cricut Easy Press Mini. Also, you can use a household iron. However, I am unsure about the quality when transferring with household iron.
Step 6: Remove Backing Plastic to Reveal Your Final Design
Finally, you can remove the backing plastic from the iron on, and you will get your final design ready here!
Here’s how my friend Kevin placed this banner on his wall!
Now, you might have an idea of how to use Cricut iron on, and I am certain that you will be able to create a similar project easily.
FAQs
Question 1: How do I place iron on vinyl on my blank?
Answer: To place your iron on vinyl on your blank, you have to follow the points mentioned below:
- First, you need to be ready with your blank.
2. Then, preheat your blank for up to 15 seconds using your Heat Press.
3. After that, find the center of your blank where you want to place your HTV.
4. Next, you have to place the weeded image onto the blank.
5. Ensure the sticky side is facing down on the blank.
6. Now, you can press the iron on using your Heat Press.
Question 2: Why is my iron on vinyl not sticking to my blank?
Answer: If you are facing this issue, it might be due to incorrect Time, Temperature, and Pressure. These three things are important in transferring your image onto your desirable blank. Simply put, if you apply too long or too short pressure, you may see your HTV peeling away from blank. Hence, you should always consider these three factors while working on HTV material.
Question 3: What projects can I make with Cricut iron on?
Answer: If you want to make something amazing using iron on, then there are many projects I have created till now. Since the possibilities with iron on are limitless, you can try the following projects easily:
- Eye Masks
- Home Decor
- Socks
- Floppy Beach Hats
- Personalized Gifts
- Custom T-shirts and Hoodies
- Tote Bags And Onesies
- Koozies
- Sports Apparel
- 10. Jean Jackets
- Blankets
Conclusion
Learning how to use Cricut iron-on is important for all beginners, as it can help them create wonderful projects. Iron on, whether a personalized T-shirt or a colorful banner, fits every project. In this blog, I am creating wall art for my friend Kevin. This particular project includes colorful vinyl; hence, if you are making the same project, ensure you have colorful vinyl types. After that, you can use any cutting machine to cut this HTV material.
Source: How to Use Cricut Iron On
For more Info, Visit here: cricut.com/setup