Cricut Maker gives freedom to the user to create custom crafts of various sizes & shapes for different events & occasions. Accompanied by its expandable range of tools & supplies, the crafter gets to learn new things every time they use the machine. Moreover, this model can create uncountable crafts that they can give as a present to their family members.
This crafting tool allows the quilters to sew materials by choosing from hundreds of digital sewing patterns. Moreover, the machine is compatible with both computers & smartphones, giving them the freedom to create new designs as per their choice.
Besides, the Design Space app assists the crafter in creating the design and then transferring it to the cutting machine. Along with the software, the user also gets the Cricut Access monthly/yearly plan. Keep going with the post if you want to get the answer to how to Connect Cricut Maker to computer.
What are Compatible Devices With Cricut Maker?
Before coming to the final decision of investing your savings into buying a new electronic cutting machine, ensure that your computer reaches the system requirements level. It isn’t mandatory to buy a new computer in order to use a Cricut cutting machine. However, for the best functionality, ensure that your current computer satisfies the basic system requirements.
Cricut Maker is compatible with both Windows as well as Mac operating systems, giving them the facility to design anything out of the scrape. The machine uses the Cricut app to create custom designs using its variety of tools and plans. It’s important for all the users to ensure that their cut-die machine satisfies the design software system requirements to make the Maker machine run efficiently.
How to Connect Cricut Maker to Windows PCs?
After knowing about the compatible devices that can easily connect Cricut Maker to computer, let’s talk about the method of connecting this cut-die machine to Windows:
- First, be sure that your Maker machine is on and placed within a 10–15 ft range of your computer.
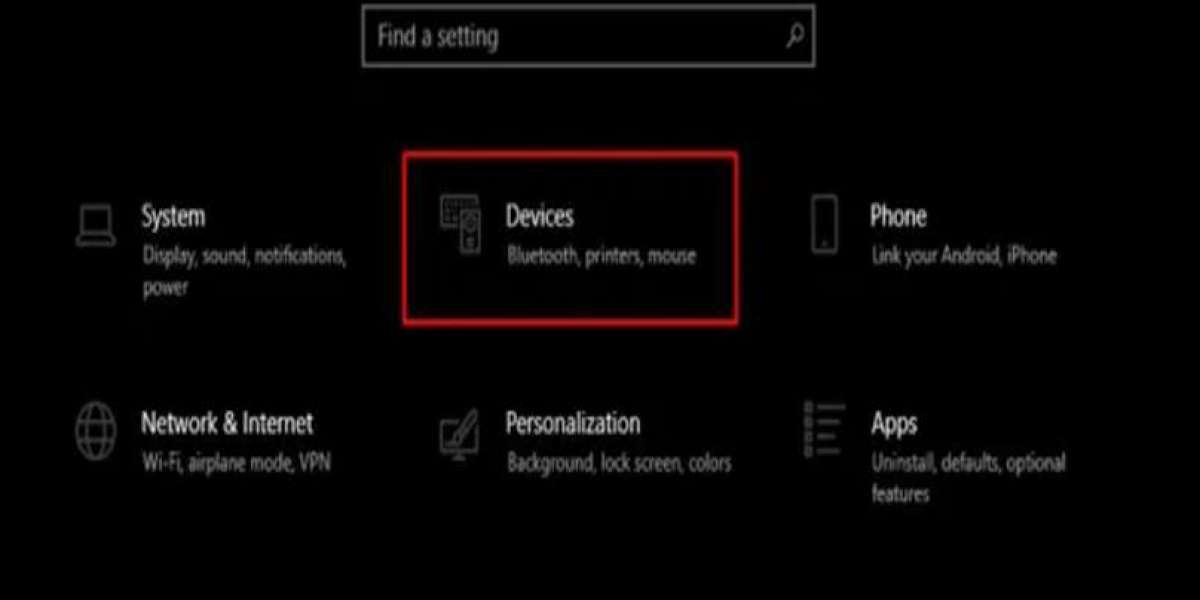
- Next, go to Settings & tick the Devices option.
3. Now, you’ve to check that the Bluetooth is on and press the Add Bluetooth or other device option.
4. After this, press the Bluetooth option and then select your machine from the list appearing on the screen.
5. Following this, submit the password inside the field and select the Connect box.
6. Lastly, your Cricut Maker & Windows computer is now connected to each other.
Besides the Windows operating system, Mac users can also connect their Maker machine by reading the details available below.
How to Connect Cricut Maker to Computer (Mac)?
In addition to the post, have a look at the forthcoming steps to learn about connecting the Maker cutting machine with Mac computers.
- In the initial stage of the process, check that your Maker machine is on and available within the range of 10–15 ft.
- Next, tap the Apple Menu and press the System Preferences option.
- After clicking the option, tick the Bluetooth icon, and a Bluetooth window will open.
- Next, inside the window, turn on your Bluetooth and select your Maker machine from the list.
- Now, press the Pair button and start typing PIN (0000).
- At last, finish the process by ticking the Pair button given on the right side of the machine.
Considering the above-said steps, all DIYers are capable of connecting Cricut Maker to the Computer.
Frequently Asked Questions
Question: Why isn’t My Cricut Maker Not Connecting to Mac?
Answer: Follow these steps to come across the steps to connect Mac with the Maker machine:
- Go to System Preferences & select the Bluetooth option.
- Next, press the Turn Bluetooth Off and open the Terminal menu.
- Now, type the link and tap the Enter button.
- After that, enter the password > restart your Mac > turn on Bluetooth.
- Lastly, try to connect with Cricut Bluetooth again
Question: How Can I Connect My Maker Machine With Windows?
Answer: Go through the following steps to learn about the connection process:
- Ensure that your Cricut Maker machine is on and within 10–15 ft range of your computer.
- Next, go to Settings & choose Devices.
- Now, ensure that the Bluetooth is on; press the Add Bluetooth or other device.
- After this, select Bluetooth and choose your machine from the list.
- Now, enter the password (0000) and select the Connect box.
- At last, the connection between your Maker & Windows will come to an end.
Question: How Do I Connect My Cricut Maker to My Mac?
Answer: Also, pursue the blog by reading the steps given in the following steps:
- Check that your cutting machine is on and available within the range of 10–15 ft.
- Under the Apple Menu tab, press the System Preferences.
- Afterward, tick the Bluetooth icon, and a Bluetooth window will open.
- Next, switch on your Mac Bluetooth and select your Maker machine from the list.
- Now, press the Pair button and write your PIN (0000).
- Finally, tick the Pair box, and the connection process will finish.
Source: Connect Cricut Maker to computer